Thursday 26 May 2011

Happy Go Lucky Layout

I have been sent this gorgeous layout from one of our customers who purchased our new mini kit 'Happy Go Lucky' and I just had to share it with you. 

'Spread your Wings' by Lesley Sharpe

The photo is of Lesley's daughter and her friend in their Prom dresses.  Lesley has included details about the Prom on a tag which she has hidden behind the photo and added some tickets to the top of the tag to help with sliding the tag out.  She wrapped some of the twine, included in the kit, around the butterfly which she then added some of her own bling to and punched out loads of butterflies from the patterned paper.  The whole effect is absolutely gorgeous and was far too beautiful not to share with you all :)

Close up of the cluster below:


Materials Used:-
'Happy Go Lucky' Mini Kit
Bling, tickets, alphabet and butterfly punch Designer's own

I love seeing what you all create with the products you purchase from Bellaboo so do share your pictures with us and a big 'thank you' to Lesley.

Monday 23 May 2011

New Cosmo Cricket

Whilst yesterday I was talking about looking at older papers with a fresh eye, we now have some brand new Cosmo Cricket papers in two different ranges, so you can cast your eyes over these!!  Both ranges have six double-sided, cardstock weight papers, an element and a border sheet, both or which are double sided also.  In addition 'Odds and Ends' has a Cardstock Sticker sheet.  

'Salt Air' is a seaside themed paper with a bold colour palette and fun images and designs.


'Odds and Ends' is a vintage themed range and the attention to detail on the designs with this range makes it something really special.


 Prices and descriptions of the papers can be found on the website and I will be having a 'play' with these very soon and producing some layouts which I will post on the blog so do check back.

Sunday 22 May 2011

Looking with fresh eyes

Sometimes when you have seen an object many times before you stop seeing it or stop valuing it and I think we can sometimes be guilty of this with our scrapbook supplies.  Often when we have held on to a paper or other piece of stash for a while or a range of papers have been out for a while we stop seeing their worth.  This week we have all our Cosmo Cricket paper ranges in our 'Specials' section and I challenged our Design Team to take a fresh look at the papers and have some fun with them and I certainly think they did a great job.

'Not a Studio Portrait' by Deb Whttaker

The 'Boyfriend' range is obviously a perfect choice for fun photos of teenage and young boys and by using so many of the elements on her page at an angle Deb has emphasised this sense of fun and really enforced the title.

Materials Used:-
Papers: Boyfriend 'Art Appreciation', 'Study Hall' and 'Tube Socks' - Cosmo Cricket
Cardstock: 'Watermelon' - Bazzill
Letter Stickers: 'Tiny Circle Alpha Stickers - Vintage Red' - Jenni Bowlin
Brad, Ribbon, Journaling Block and other images are Designer's own.

'Two in the Bed' by Nicky Parry

Another great layout where the elements have been placed at an angle to create a sense of fun and I love the crisp look that a red and white colour scheme gives.

Materials Used:-
Patterned Paper: Materials Girl 'Elements', Tailor Made' - Cosmo Cricket
Buttons and Alpha Stickers from the March Kit 'For the Record'
Title & Flowers cut on a Cricut Machine
Ribbon Designer's own

'Country Girls' by Martina Gardner

Martina has mixed and matched from two different Cosmo Cricket ranges but because they are from the same manufacturer the colours still work very well together.  I love the fun animal elements from the Garden Variety range.

Materials Used:-
Patterned Papers: Garden Variety 'Borders', Boyfriend 'Study Hall' - Cosmo Cricket
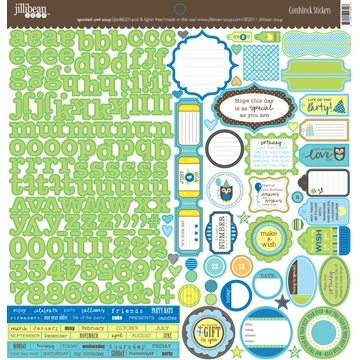
Alpha Stickers: 'Kraft Mini Alphas - Black' - Jillibean Soup, title stickers from May Monthly Kit 'Spotted Owl Soup'
Cardstock Designer's Own

'10 Years On' by Deb Whittaker

A great idea for a layout; I love the sweet photo of Deb's boys when they were young together with the more recent photos and Deb's comments on the changes in the boys in the 10 years.

Materials Used:-
Patterned Papers: Garden Variety 'Sunshine', 'Borders', 'Elements', 'Tossed Salad' - Cosmo Cricket
Sticker Alphas from the May Kit 'Spotted Owl Soup'
Ribbons Designer's Own


'Playground Fun' by Tracy Latham

A double page layout and the yellow and red in the papers are a perfect choie for the primary colours of the playground equipment and the bright Spanish Sun!  Again, Tracy has used papers from two different ranges to great effect.

Materials Used:-
Patterned Paper: Material Girl 'Calico', Garden Variety 'Sunday Picnic' - Cosmo Cricket
Alpha Stickers, Flowers and Buttons are Designer's own.


'Back to Tisbury' by Nicky Parry

I love the fact that all the Designer's chose to use different Cosmo Cricket ranges and here Nicky has enjoyed playing with the 'Joy Ride' range which is such a fun range with a great colour palette.

Materials Used:-
Patterned Papers: Joy Ride 'Pit Stop', 'Round About', 'Zoom Zoom' - Cosmo Cricket
Stickers: Joy Ride 'Cardstock Stickers' - Cosmo Cricket
Title cut on a Cricut Machine

So try looking again at some ranges that, just because they have been around for a little while, have perhaps become over familiar and take advantage of our 20% discount on Cosmo Cricket papers.  I would love to know what you think and if you feel challenged to have a go :).

Wednesday 18 May 2011

Happy Go Lucky!

We have a gorgeous new Mini Kit, 'Happy Go Lucky', which has gone on sale today and I thought I would share the layouts I have made using the kit and show you the five papers in more details.  As well as the papers there are two sheets of cardstock, a die-cut butterfly, twine, ribbons and Prima flowers included in the kit.


Each are double-sided, even the die-cut sheet, and the reverse side is equally as useable as the front.  I had a lot of fun playing with the kit and was able to make three layouts from this single kit making it excellent value.


I did 'gut' a number of the pages to make them go further but still have some ribbon and flowers left to use on another project :).  My Mind's Eye create such gorgeous, high quality papers and these were a real joy to use.  I would love to see any layouts you create using this kit also.

Tuesday 10 May 2011

Bubblegum Hills Kit

I just thought I would share with you a couple of gorgeous layouts sent in by one of our customers using last month's kit, Bubblegum Hills.  I love it when customers share their creations using the Bellaboo products and Sue creates stunning layouts as you can see below.


Easter Bonnet and My Angel by Sue Costi

Sue's daughter is the cutest and is often the feature of her layouts and the beautiful papers and embellishments from the Kit work perfectly with these photos.  The Bubblegum Hills Kit proved very popular and so are now in very short supply but there are a few left if you feel inspired by Sue's creations to scrap your Easter or Spring photos (or your cute little daughter!).  More inspiration for this Kit (and all the others) can be found in our Gallery.

Happy Scrapping!

Sunday 8 May 2011

This Week's Specials

This week's Specials are the bold, bright and beautiful papers from Bazzill - so well known for their enormous range of cardstock, this is their first step into the patterned paper market.  There are six double-sided, cardstock weight papers and a die-cut and sticker sheet to co-ordinate.  I love the boldness of the patterns and colours and you can either embrace that colour palette as I have with my 'Painted Faces' layout below, or tone down the colours by mixing them with a more neutral background as Nicky has with her 'Working Together' layout below.

'Working Together' by Nicky Parry

I love how Nicky has mixed so many of these papers together and despite all being bold and bright, they work so well together.  Nicky has stopped this big mix of colours and patterns becoming overwhelming by toning down the effect by using a neutral background and leaving lots of 'white space'.  I also love all the little details such as the gloss added to the owl and the rings on the scalloped circles, the use of border punches and how the brown spotted paper has been cut and attached to look like ribbon.

Materials Used:-
Patterned Papers:- Grandma's Feather Bed, 'Art Deco', 'Deco Daisy', 'Grandma's Damask' - Bazzill
Cardstock:- 'Kraft' - Bazzill
Title and Owl cut on Cricut machine
Other:- 'Glossy Accents' - Ranger

'Painted Faces' by Kate Holliday

On this layout I have gone with the bold colours from the paper line and carried it through with the cardstock, lettering and embellishments but have kept the look quite geometric and with just two main colours which stops it becoming too fussy and overwhelming.  Many people shy away from using orange but I love the zing that it brings and particularly like an orange/blue colour scheme.

Materials Used:-
Patterned Paper: Grandma's Feather Bed 'Tulip Damask' - Bazzill
Cardstock:- 'Intense Teal', 'Intense Orange' - Bazzill
Letters: 'Corrugated Kraft Alphas' - Jillibean Soup, other Designer's own
Ribbon: 'Orange/Yellow Grosgrain Circles' - May Arts, 'Tulle - Splash' - Bazzill
Buttons: 'Aqua Splash', 'Marrakesh' - The Button Company
Shimmer Misters: 'Cosmic Shimmer Misters - Ocean Sunlight' - Cosmic Shimmer
Other: Embroidery Cotton and Journaling Block Designer's Own


'Compare the Meercat.com' by Martina Gardner

This is such a fun layout, from the stunning photos and the fab title, and I love how Martina has tied the two sides of the layout together by repeating some of the embellishments despite the two sides being laid out diferently.  Martina has been very frugal and only used one sheet of the patterned paper by 'gutting' the centre of the sheet and using this on the opposite side, proving that you can still produce great layouts even on a budget!

Materials Used:-
Patterned Papers:- Grandma's Feather Bed 'Deco Daisy' - Bazzill
Cardstock:- 'Blush Red Dark' - Bazzill
Ribbon:- 'Leaf Trim - Parrot Green' - May Arts
Blossoms:- 'E-Line Flowers - Aqua', 'E-Line Flowers - Pink' - Prima
Journaling Block:- 'Life Stories - The Way It Is' - My Mind's Eye
Other:- Brads - Designer's own

The 'Grandma's Feather Bed' is only on Special until midnight tonight so do hurry if you want to grab it at the reduced price.

Thursday 5 May 2011

My Favourite Soups!

I just love the new 'Soup' ranges from Jillibean Soup and both Nicky and I have had a lot of fun playing with them as you will see below.

'The Fruits of Your Labours' I created using the 'Dutch Mustard Soup' range which is in gorgeous shades of browns, greens and oranges - almost autumnal - which are very much my colours.  I 'gutted' two of the papers to allow me to use the inards for matting etc and also sewed around the frames and down the middle of the three butterflies so that their wings could be lifted.  There are two butterflies that come on the diecut sheet and so I used the hole that was left when I pushed one out to use as a template for another butterfly as I wanted three!

Materials Used:-
Patterned Papers:- Dutch Mustard Soup 'Cornstarch', 'Leeks', 'Wholegrain Mustard' by Jillibean Soup
Die Cuts and Journaling block:- Dutch Mustard Soup 'Pea Pod Parts (Diecuts)' - Jillibean Soup
Ribbon:- 'Bean Stalks - Brown Natural' - Jillibean Soup
Letters:- 'Chipboard Alphas - Gingham', 'Kraft Mini Alphas - Brown' - Jillibean Soup


These gorgeous photos are of one of my Godsons on his fifth birthday when he visited 'Build-a-bear' and actually chose a dog (he is dog mad) instead of a bear but he loved it!  I once again used the Dutch Mustard Soup range (I told you I loved it!) as the tones worked perfectly picking up the bear and flooring in the photos.  I tore one of the sheets of paper and then wet the edges so that I could curl them in.  When they are dry they stiffen and so stay as you have molded them which gives a great 3D effect.

Materials Used:-
Patterned Papers:- Dutch Mustard Soup, 'Gruyere Cheese', 'Cornstarch', 'Creme Fraiche', 'Dry Mustard Powder' - Jillibean Soup
Die-Cuts:- Dutch Mustard Soup 'Pea Pod Parts (Diecuts)' - Jillibean Soup
Corrugated Frame:- 'Corrugated Kraft Frames' - Jillibean Soup
Ribbon:- 'Black Paw Print Twill' - May Arts
Letters:- 'Playroom Felt Thickers - Chestnut' - American Crafts, 'Kraft Mini Alphas - Brown' - Jillibean Soup


This gorgeous layout, 'Free Wheeling', is by Nicky and uses the beautiful, summery papers from the 'Blossom Soup' range.  I just love how she has created the flowers along the top, it really adds to the carefree feel of this layout.  She has also cut out some of the clouds from the 'Corn Kernals' sheet and added a foam pad behind to give a bit of depth to her layout and to make them stand out from the cardstock below.

Materials Used:-
Patterned Papers:- 'Blossom Soup', 'Anejo Cheese', 'Cornmeal', 'Corn Kernals' - Jillibean Soup
Die-cuts:- Blossom Soup 'Pea Pod Parts (Diecuts)' - Jillibean Soup
Cardstock:- White - Bazzill
Letters:- 'Corrugated Alphas - White' - Jillibean Soup
Buttons & Embroidery Thread are Designer's own

So do you have a favourite Soup?!!!

Wednesday 4 May 2011

Birthday Gift Box!

I love the new kit Kate has put together - from the name (Spotted Owl Soup!) to the lovely fresh colours (greens, blues and yellows) to the fabulous embellishments. I really enjoyed using it to put togther a couple of layouts (take a look at the gallery on the Bellaboo website). As this month's kit had a birthday theme, I was inspired to use the leftover patterned paper to make a card and a matching gift box, and I was very pleased with the results! I thought I would share with you how I made the gift box so you can have a go yourselves!

Step 1
The template can be downloaded as a PDF here.
Cut out the template shapes and glue together where indicated. Lay the template on a piece of 12 x 12 cardstock, and cut out the gift box (along the solid lines). Score along the dotted lines.
Step 2
Using two different sheets of patterened paper, cut out four rectangles (measuring 8.5 by 6.5 cm) and four triangles (measuring 6.5 cm along the base and 6cm along each side).


Adhere to each side of the gift box. Punch out the holes at the top of each triangle and set an eyelet in each one.
Step 3
Embelish the gift box using the pea pod parts and the cardstock stickers. Thread the green ribbon through the eyelets and tie in a bow to close the box, and - voila - the perfect box for small gifts!

Sunday 1 May 2011

May - a month to celebrate!

Happy May Day!  I can't believe that May is here already and that means that this month I will have owned Bellaboo for a whole year - where did the time go?  It has been an amazing year and I have been on a steep learning curve but I have loved every minute of it and consequently I want to spend the month celebrating with you.

Firstly we have our new Kit, 'Spotted Owl Soup' which is a birthday related kit full of fun and quirky owls with party hats and balloons.  This is such fun to use and you can find full details of the kit and add-ons on the website here.  However, I thought I could show you the papers and die-cut and sticker sheets here in more detail so here goes:-


These are the six double-sided cardstock-weight papers, the 12"x12" die-cut sheet and 12"x12" sticker sheet.  As you can see they are in gorgeous fresh colours and with so many elements to add it makes creating layouts and cards a real doddle.  There is an Inspiraion Sheet for you to download and keep here and also you can browse our Gallery to see what we have been up to.  We will also be adding some more creations to the Blog this coming week so make sure you check back.

So back to the celebrations.  Because I want you to all celebrate with me, anybody placing an order on the website this month will receive a free gift.  Also if you purchase this month's Kit and send us a picture of your favourite creation you have made with it by the end of May (be it a layout, card or other off-the-page project), the design team and I will be choosing our favourite and that person will receive the June Monthly Kit free.  So even more reason to order this month's kit, even if you needed one.  We love to see all the creations you have made with Bellaboo products anyway, but this is just one more reason to send us a picture :).

Enough of me going on for now but do check the Blog regularly to see what is happening at Bellaboo.

Enjoy the rest of your bank holiday weekend.